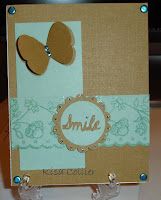
This blog was started to show off my creative side. I hope you enjoy what you see.
Christmas Themed Gift Card Holders
Santa's Village Christmas Card
I gave the Santa a little more color with the Copic E33 marker and added a little sparkle Copic Spica markers.
The Craft Room started glitching after a while so I finished my card elements directly on my imagine.
Scraps
If you are like me, you find yourself with more scraps of cardstock and patterned paper than you have projects to use them. I have decided to start making either 3x3 or 4x4 cards to use on gifts instead of purchasing these small cards from the store. Like I mentioned a few months ago, you may want to start making tiny embellishments such as flower pots, roses, and paper punches with your scraps to minimize your pile. Because you have endless possibilities with your tiny creations, you can save the embellishments for future layouts and cards.
Just a Note
I recently purchased the CTMH Art Philosophy Cricut Cartridge bundle. Well, last night was the time moment for me to check out how to make those cute little flowers that are on this cartridge. Using the Gypsy, Expression, quilling tool and glossy accents made this process a cinch. Subsequently, I could not let these cute little flowers go to waste. I found a card sketch from Splitcoaststampers.com and used my Color Scheme Bible book by Anna Starmer to find some card stock that would coordinate with my flowers. This book is used by interior designers to pick out color palettes but I use it to help pick out coordinating colors for my cards and layouts. I used Copic sketch markers to color my image and ribbon. I used SU pixie pink to stamp the image. Thanks for checking me out.
Celebrate My New Copic Markers
Today, I am celebrating by using the Copic markers that I recently purchased. I found this cute little digi stamp in my collection. It was so much fun coloring her. The paper is from the DCWV Citrus paper stack. This stack is filled with lots of fun papers and they matched the Copic markers that I decided to use. The ribbon and buttons are from SU. I used the Cloud edge Corner Chomper to decorate the edges of my image as well as SU Bermuda Bay and Certainly Celery ink. Thank you for checking out my work. See you next time.
You are My Boo
This past weekend I was looking at some images that I had not colored and came across this particular Bella image. I am not sure of the name because I had this image for a few years. Halloween is next month so I decided to try my hand at making a card with this cute little witch. It was a challenge finding paper for this card in my paper stash because I do not usually make anything for Halloween. I used my Copic markers, Smooch pearlized top coat to get a little shimmer action, and my Gypsy and Expression for my bat die cuts. The Ribbon is from my old Stampin Up stash. It was so nice not running out to the store to purchase more stuff. I was able to find everything that I needed right in my woman cave. ;-)
Thank you for checking out my work.
Cruisin 2011 Digital Layout

Here is a digital layout using some of my pictures from the cruise my family and friends took March 2011. This digital paper is from Studio Miki's Cruisin in the Carib collection. Check out her blog at http://tinyurl.com/MicroferkDesignsBlog.
I really enjoyed putting this layout together.
Thanks for checking me out.
You Are Never Too Old To Learn

I decided to expand my knowledge on creating layouts and making cards by participating in the Ella Publishing Boot Camp. I must admit that I am multi-tasking this project because I am doing the boot camp and a birthday challenge using teal and red. Plus, since I just finished a Copic’s certification class, I decided to use my Copic markers. I also combined what I learned from boot camp about pattern design and photo editing tricks on this card.
The products used for this card include:
Papers: SU’s pattern paper, Taken Teal, and Real Red;
Stamps: SU Embrace Life
Inks: SU Taken Teal (sentiment), Copic Markers- R46, BG13, BG15, BG18 (flower).
Accessories: Prima Flowers and SU Rhinestone Brads.
Learning new techniques and tricks this month has been great. I am really looking forward to my next learning adventure.
Exciting News

I am Copic Certified. Whoohoo.
My good friend Trish Butler and I attended the Copic Certification class that was taught by Colleen Schaan in Savannah on December 8, 2011. The class was worth every penny I spent because I learned so much about these wonderful markers. Now I am ready to go out and share my knowledge.
New Orleans Page 2_Digital Layout

I finished my New Orleans pictures. The more I use Photoshop Elements the better I get. One of the main things that I learned is to duplicate any elements that I plan to use more than once after I put a style on them, then move the element to the desired spot on my layout. One thing that I like about digital scrapbooking is the fact that the supplies do not take up space in my craft room. NO ADDED CLUTTER TO THE WOMAN CAVE, YEAH! The downside is I want more papers and elements to build layouts. Now I must go on a Google hunt for all the freebie I can find. Hahahaha
New Orleans 2009
Beach 2010 Digital Layout

This is my second digital layout using Photoshop Elements. I made two using the online service through Close To My Heart. I admit that it is quicker to use CTMH, but it is more expensive. I think I would rather use Elements and send layout to ScrapbooksPlease.com to get the print. Also, Shutterfly is another service you can use and they have some neat hard cover books that you can make using layouts and/or pictures. How about Shutterfly is running a 30% off special on the 12x12 books. You might want to check it out. Thanks for stopping by my blog.
My First Digital Layout

This is my very first digital layout and I am so excited. I have worked with Photoshop and Elements for quite some time but I have not tried my hand at this before. Anyone who knows how to use Adobe Photoshop and/or Elements should dive right in and try your hand at digital scrapbooking. Thank you for stopping by to check out my blog.
More Projects this Weekend
Sister's Mini Album

I am still using scraps while making this album. I used my cuttlebug for the deco label, my gypsy and expression to cut out the letters that I put glaze accents on, Prima flowers that I put a little bling on, and my Bind-it-all to put the book together. The album cover is made with recycled chip board cut with my expression using the elegant edges cart. I really love that cart. This album has regular and pocket pages. TFL
Special Projects -June 2011
June Work
A Kisa Thank You

This is a Rubbernecker.com image named Keesha. I just had to have the stamp since it is so close to my name. hahaha. I used Copics, stampin up markers, and Smooch pearlized accent inks to color my image. I colored my Prima flowers using my stampin up re-inkers and topped them off with a little stickles. The thank you sentiment is from a Stampabillities cling rubber stamp set.
I hope you all like it.
Cruise 2009 Layout

I just finished this layout. My husband and I took a cruice to the Bahamas in 2009 and I am just starting on the scrapbook pages. Talking about taking my time. Any who, I used my Imagine with the Pack Your Bags Cricut cartridge and the Imagine More Imagine cartridge to make all the embellishments for this page. Thanks for looking.
Weekend Projects

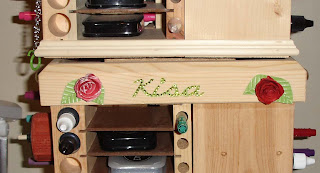
This weekend, I continued experimenting with crafting tools that I have in my arsenal that have been idol every since they came into my craft room. The tools of choice this week are the Cricut Imagine and the BeJewler Pro.
My first quick project was a graduation card that I made on my Imagine using the Wrap it Up regular Cricut cartridge together with the Better Together Imagine cartridge. I made the green card stock from the color palette on the imagine cartridge. The embellishments are made from images on the Wrap It Up cartridge that were flooded with some patterns from the Better Together cartridge. Let me tell you, the possibilities are endless using the Imagine. I know some people feel this machine cost a lot of money, but hey, I feel it’s worth every penny that I spent. Oh yeah, I almost forgot, I used the BeJewler Pro to add a little bling to the graduation hat.
After the quick application of the bling, I felt like experimenting a little more with the BeJewler Pro. So I decided to add a little bling to my ink pad caddy. Some of you may remember that I added my name and some roses to it a few weeks ago. Well, I step my name up a notch by blinging it out. I like using the BeJewler Pro because you don’t have to fight with glue and the bling. I may consider doing a video demoing it in the up coming weeks.
I hope you like it. Thanks for looking and come back to visit my blog any time.


These cupcakes are for an embellishment swap that I joined with one of our Craftin’ Sistahs on Facebook. These cupcakes gave my expression a serious workout and it was about time that it had one. I used the Sweet treats Cupcake #4, Cupcake #4 + Shift, Layers and Layers + Shift for Cupcake#4. These were all cut at 3.75”. If you decided to try these, make sure you DO NOT use the REAL DIAL SIZE feature. I used my favorite go to Stampin’ Up punches for the scalloped oval and regular oval and the “find reasons to CELEBRATE be happy” stamp is from the Sweet Serendipity from SU. Thanks for looking.
RAK_Cards

I made these cards to send with some RAKs. The stamp art is from SU's Pocket Silhouettes set. I used several different punches to embellish my card which consisted of SU's scalloped oval, small oval, large oval, round corner punch, and/or ticket corner and a Fiskar's edge punch. The designer paper was from a Martha Stewart's 12x12 playful blue paper pad. The solid cardstock is from Hobby Lobby.
The layout is one that I found on another forum. As you can see, I decided to play around with different elements on the layout to see which one I like the best but I cannot decide which one I like the most.
TFL

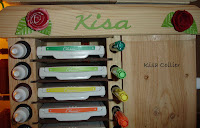
Boy! I caught the devil learning to how to make these roses. The one on the left is made from core paper and the one on the right is made with SU card stock. The leaves are made from core paper too. I used the paper crimper to texturize the leaves and I filed them a little to show the white in the green paper.
I also learned to weld with my gypsy. So I used the roses that I just learn to make along with my welded name to alter my ink caddy.
Boo Valentine's Day Card
Completed Mini Album
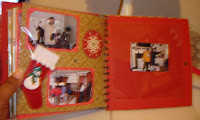
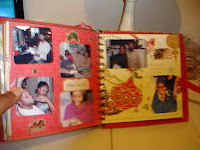
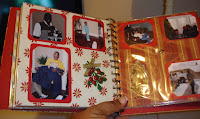


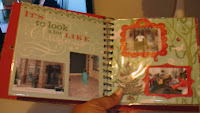


It has been over a month and I finally finished my niece Tiffany and nephew Bobby's hand made mini album of this past Christmas. My husband requested that I make this album for them to express our appreciation of their hospitality. Our whole family really enjoyed spending time with them for Christmas.
The album cover was made from recycled chipboard covered with paper from a K & Company pack that I purchased at Michaels at 90% off. I used my gypsy and cricut for some of the embellishments but most of them were also purchased at Michaels for 90% off.
I really hope my niece and nephew like this album because it took me all day to put it together.
Thank you for looking and please feel free to leave a comment.


